Moduno
Tools that mean business.
The Email Validator Pro
A standalone Python script for validating email lists before sending.
✔ Removes duplicates, checks MX records, and detects disposable domains
✔ Flags role-based emails, placeholder patterns, and labels type of domain
✔ Checks for gibberish usernames, domain typos, and extensions known to be used in spam traps
Works with Google Sheets. One-time payment. Yours forever.No API limits. No UI. No guessing.
The Problem
Cleaning Your Email List Is Costly...
Not cleaning your email list is too.
The risks of not cleaning your email list include hitting spam traps, damaging your sending reputation, and getting blacklist. The solution: clean that list!You no longer have to choose between expensive online email validators that charge per lookup versus sending emails while crossing your fingers nothing bounces.
The Product
The Validator Pro Checks the Following
Included in the Regular version:
✔ Can Receive Email – Verifies domain has a valid mail server (MX record)
✔ Disposable Email? – Flags 260+ temporary or burner domains
✔ Generic Inbox? – Warns if the email is likely a role-based address (e.g. info@, support@)
✔ Placeholder Address? – Flags generic or fake-looking inboxes (e.g. test@, noreply@)
✔ Company Website – Automatically extracted from the domainThe Pro Version Adds
✔ Spam Trap Suspect? – Flags potential spam traps using:
Gibberish or non-name usernames
Common domain typos (e.g. gnail.com, yahho.com)
Suspicious or invalid domain extensions (e.g. .cmo, .ml)
✔ Real Name Pattern? – Checks for typical name-based formats, e.g. john.doe@
✔ Free Email Provider? – Flags Gmail, Outlook, Yahoo, etc.
✔ Domain Type – Flags whether a domain is used commercially, or in government, academia, the military, or non-profits
✔ First Name Guess – Attempts to extract a first name when possible
What You Get
✔ Status + Risk Score for every email
Looks Good or Needs Review
Risk level from Low to High
✔ Data written directly to your connected Google Sheets
✔ Runs locally on your machine (Python + Google Sheets)Includes a setup guide with screenshots, FAQs, and a troubleshooting PDF.One off payment, no subscription - the script is yours to run time and time again.
What People Might Be Saying...
I have so much to do, I won’t be available for calls or meetings this afternoon.
The most reliable thing in my life right now? A script I didn’t even write.
Crushing it at my 3 jobs – thanks Moduno!
My boss thinks I cleaned a list of 10.000 emails. I watched YouTube all day.
Moduno is my best auto-mate.
I wish my boyfriend was this responsive.
More Coming...
Suggestions, requests, feedback?
Get in touch.
Setup Guides
Google Cloud Setup
Create a Google Cloud Project (step 1/5)
Go to Google Cloud Console and click Select a project.Note: If it’s the first time you’re visiting the console, you have to agree to the Terms of Service.

Click New Project in the top right corner.
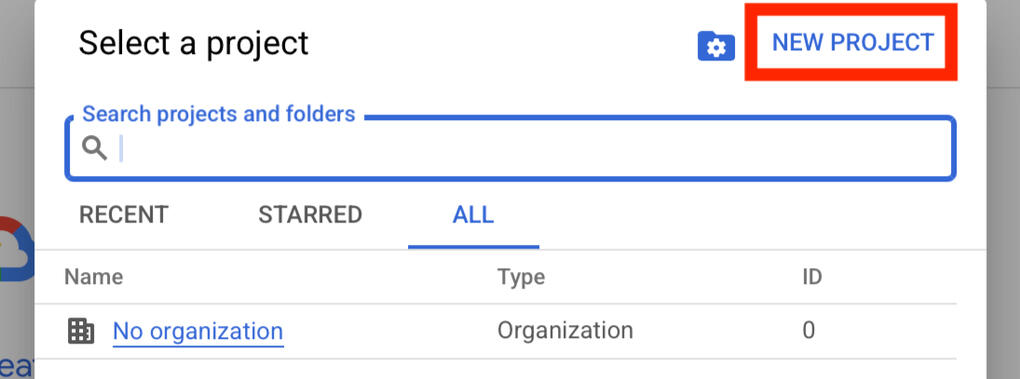
Give your project a name, e.g. “email validator” and click create.
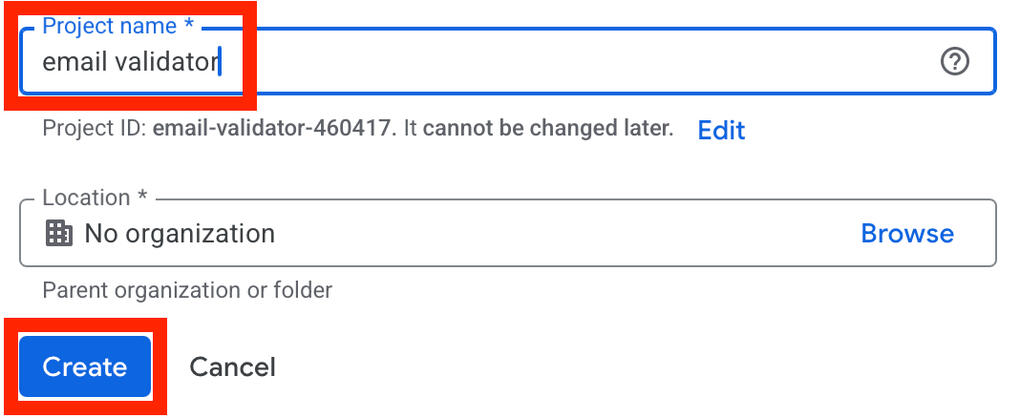
Click Select a project again.

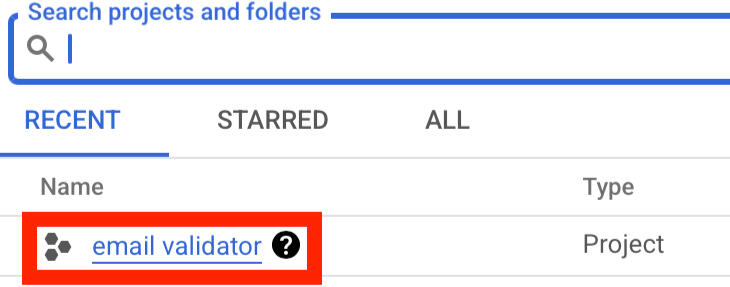
Pick the project you just created.
Enable APIs (step 2/5)
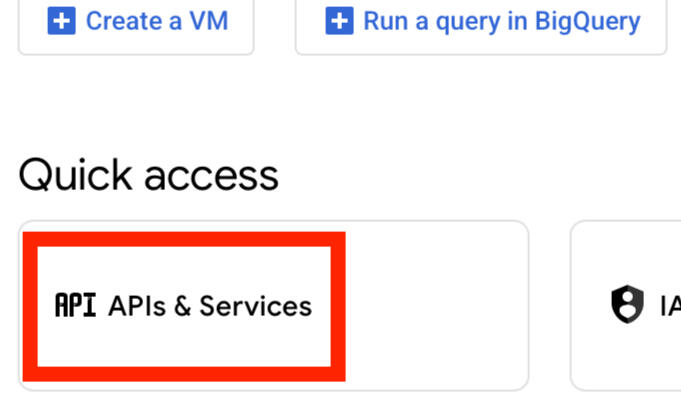
On the project page, go to APIs & Services.
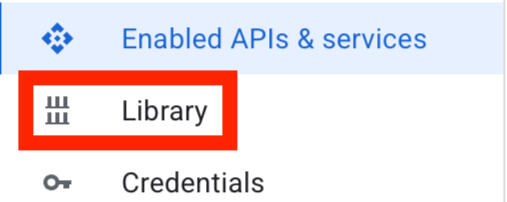
Go to Library.Or go to: apis/library.
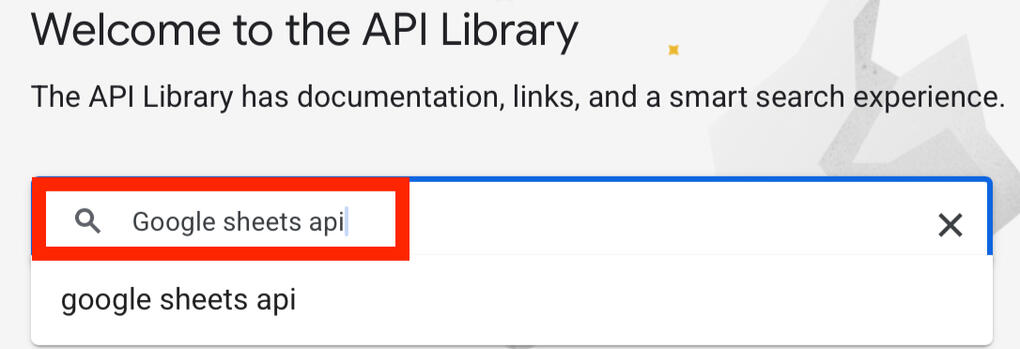
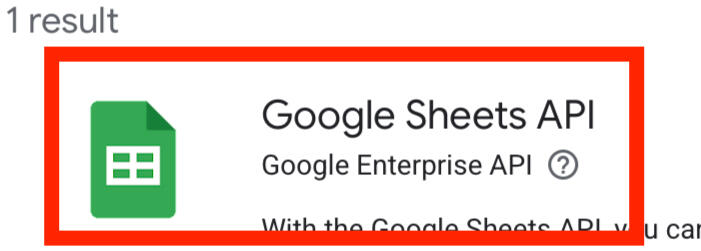
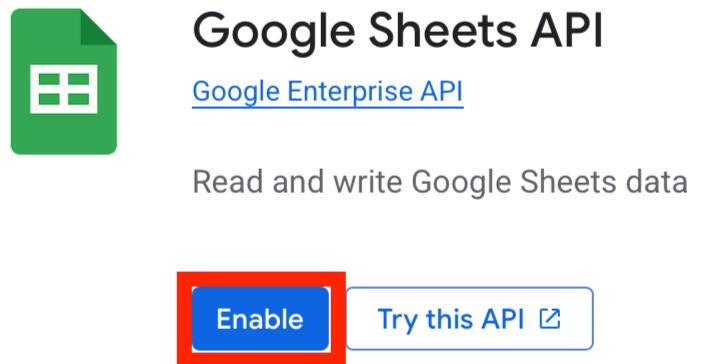
Search and enable:
- Google Sheets API
- Google Drive APIAfter enabling the Google Sheets API, go back to apis/library and follow the same steps for the Google Drive API.
Create a Service Account (step 3/5)
Go to APIs & Services > Credentials and click Create credentials in the top right corner.

You’ll be asked what data you will be accessing; choose application data. Then, click Next.
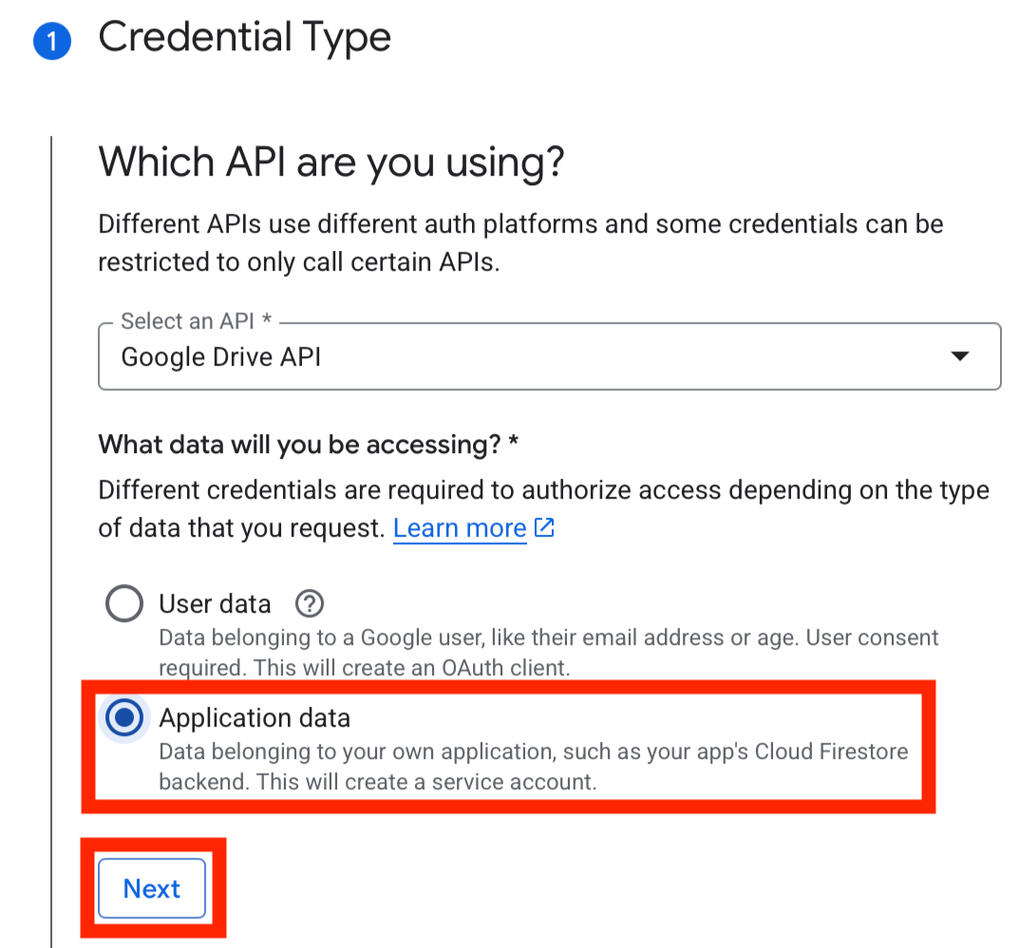
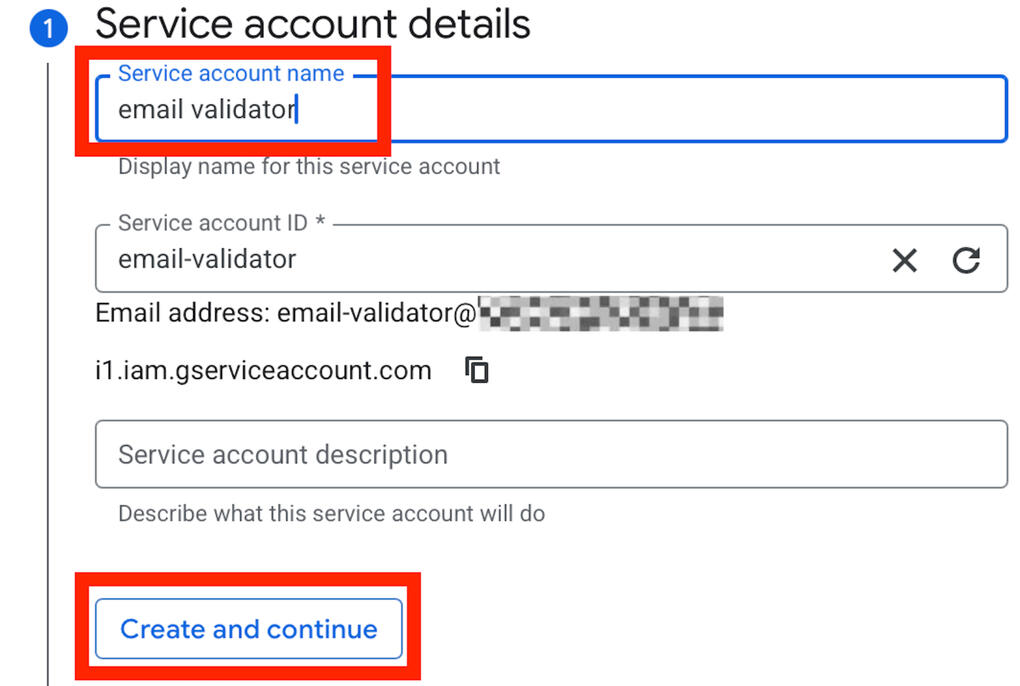
Create a service account name, e.g. email validator.Click Create and continue.Click Done.

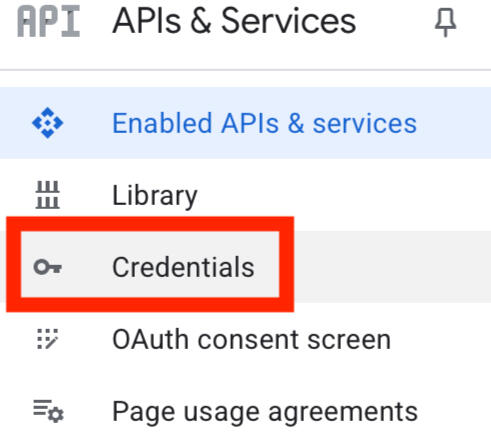
On the left side, go to Credentials.
Click on your service account at the bottom of the page.

Click Keys at the top.

Generate Credentials (step 4/5)
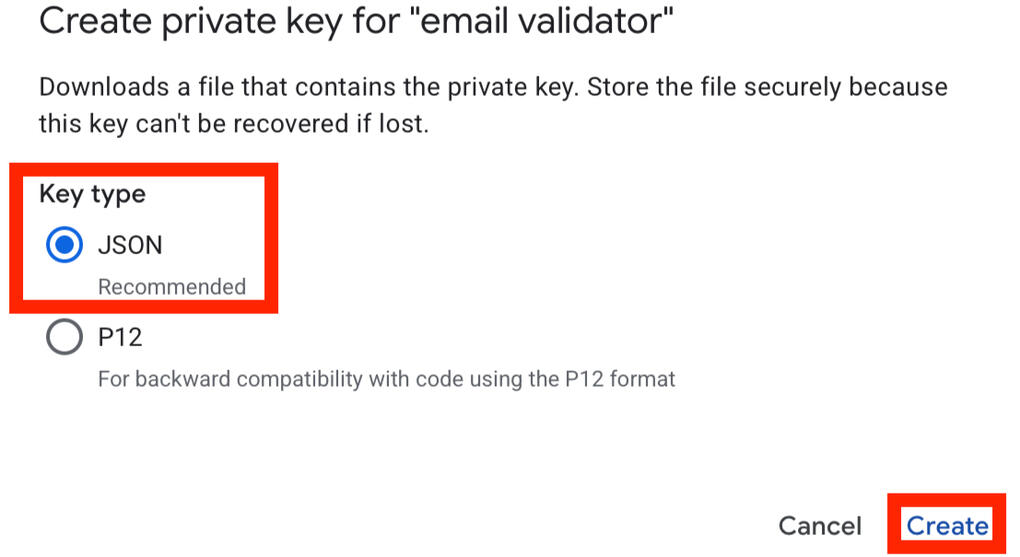
Click Add Key > Create New Key.
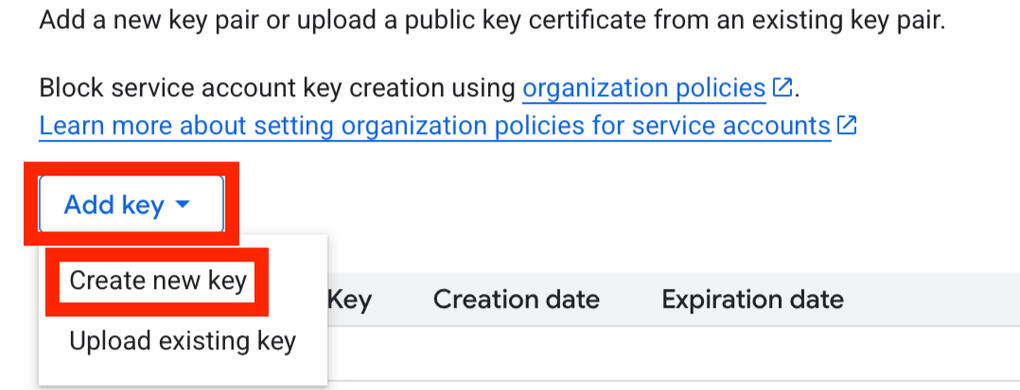
Select JSON and click Create.Download the file, rename it to creds.json, and place it in the same folder as the script.
Share Your Google Sheet (step 5/5)
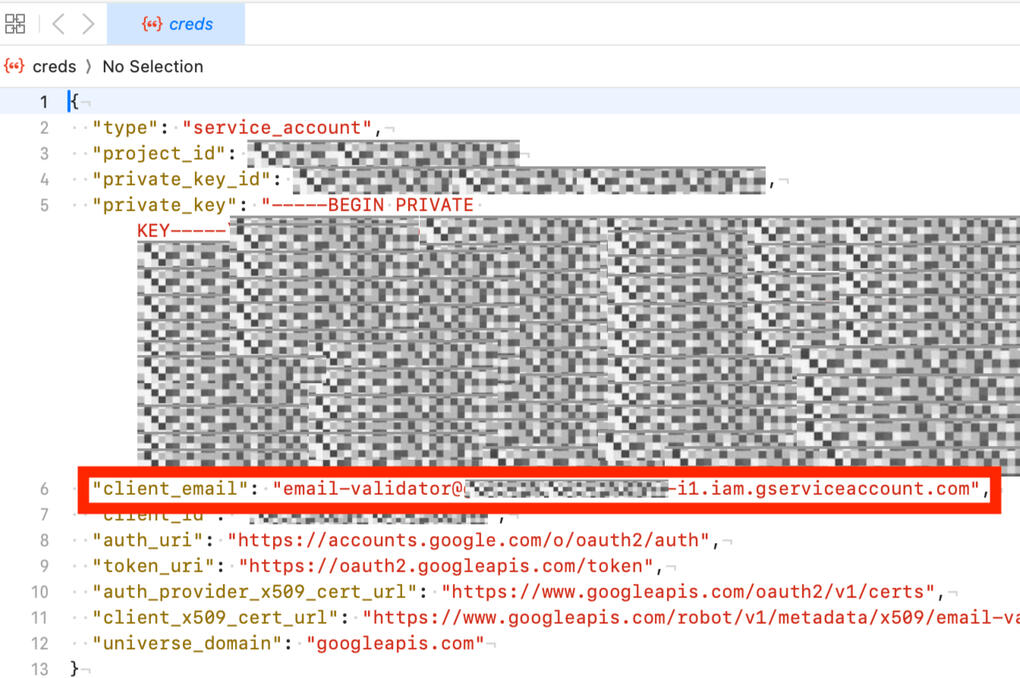
Open your Google Sheet.If it’s a new Google Workbook, give the workbook a name, for example ‘Email Validator’.Click Share and add the client_email from creds.json as an Editor.Tip: Double-check this step — it’s the #1 place users make mistakes.
Prepare Your Script Folder & Set Up Your Python Environment
Setup Your Email List Cleaner & Validator
Setup Guides
Email List Cleaner & Validator for Mac
Prepare Your Script Folder
Create a folder called email_validator in the desired location.
(or drag the existing email_validator folder from the downloaded folder to the desired location.)
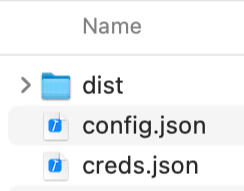
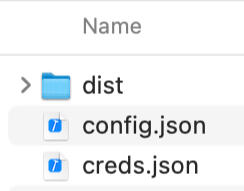
Make sure it contains:
The dist-folder - This folder contains your script and a runtime folder that will make sure you can run the script.
creds.json - This file was created during step 5/5 of the Google Cloud Setup. You shared the Google Sheet with the client_email from this file. ensuring your script can communicate with your Google Sheet.
config.json - This file has to have the name of the Google Sheet and tabs used. This allows the script to read from and write to the correct place.
Set Up Your Python Environment
A virtual environment is required. It isolates the script’s tools from the rest of your computer, prevents errors, and makes installation easy.
Open the Terminal
Navigate to your script folder from the terminal.
cd /Users/yourname/Documents/email_validator
Create & Activate the Virtual Environment
Run the command to create the virtual environment.
python3 -m venv env
Run the command to activate the virtual environment.
source env/bin/activate
If prompted, select: Always run.
Now you’re in the environment, which you can see from the (env) in front of your command line:

Install Required Packages
Run the following command:
pip install gspread google-auth dnspython
You’ve installed the required packages to run the script.
Important: Always run the script from inside this environment.
Update Script Placeholders
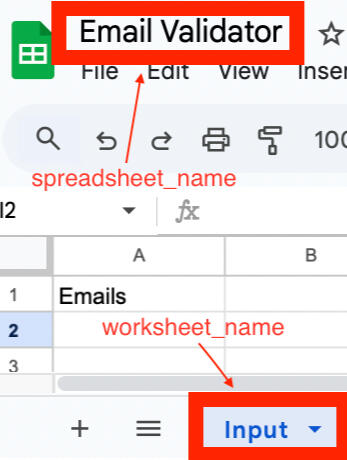
Go to config.json in your emailvalidator_ folder. Here you can edit:
{
 "spreadsheet_name": "Email Validator",
 "worksheet_name": "Input",
 "output\_tab": "OUTPUT"
 }
Note:
Names have to match exactly - The spreadsheet and worksheet names have to be identical to the names in the config.json file for the script to run.
Use quotation marks in config.json, but not in the spreadsheet.
Results are written to a tab called OUTPUT. If you prefer another name, adjust it in the config.json file. There’s no need to create the output tab in the spreadsheet, the script will do this automatically when it runs.
Run the Script
To run the Pro version:
python3 dist/email_validator_pro.py
To run the Standard version:
python3 dist/email_validator_standard.py
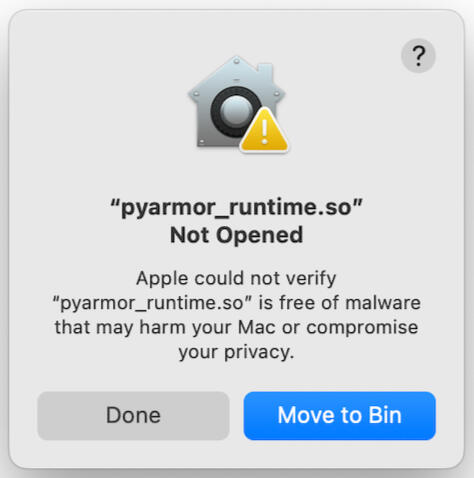
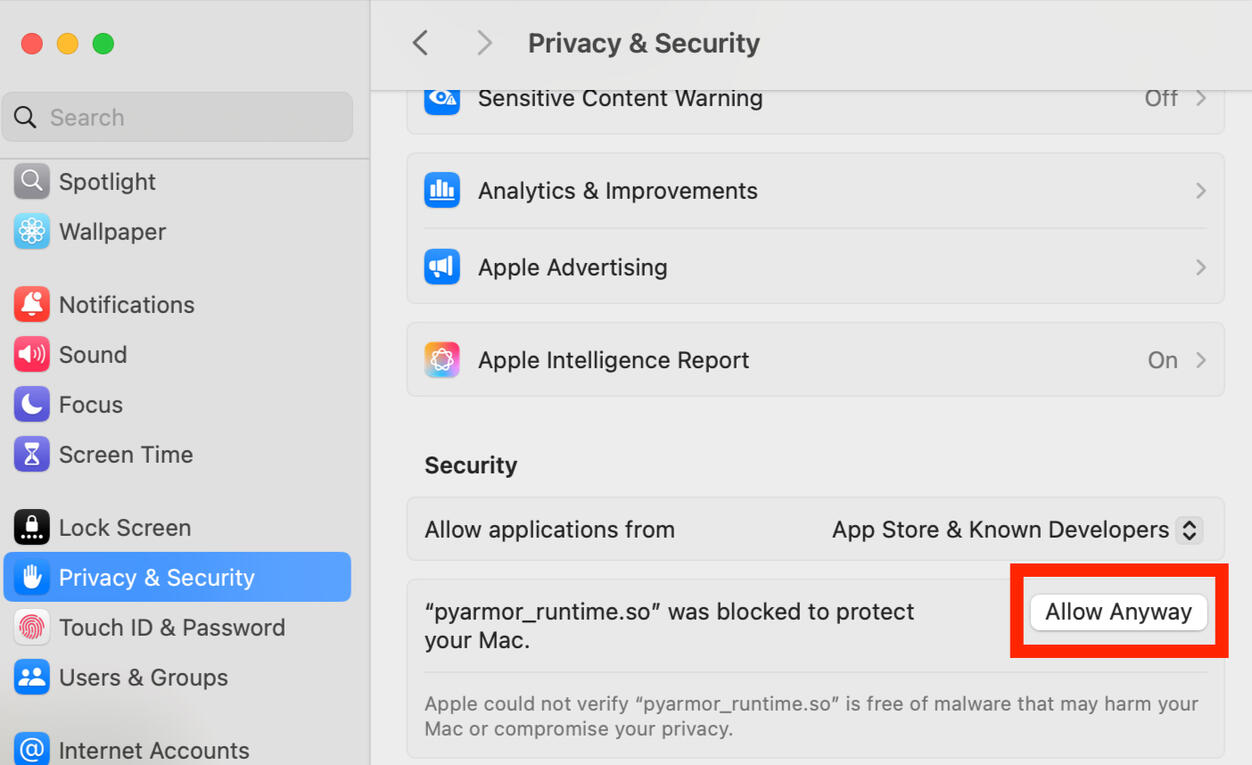
Are you seeing a macOS Security Warning?If you see a warning that the script contains a potentially malicious file (pyarmor_runtime.so), it's safe to proceed.Go to: System Settings > Privacy & Security > Allow Anyway, then re-run the script.
You’re Now Ready to Validate Email Lists
EXTRA: Styling Tips for the OUTPUT Tab
Freeze the header row - Go to View > Freeze > 1 row to keep the headers visible as you scroll.
Format the header - Select row 1, click Bold, wrap text, and enable Filter (via the filter icon or Data > Create a filter)
Add conditional formatting to Column C ("Risk Score") - Select Column C, go to Format > Conditional formatting, Set the criteria to “Text contains”
Low → Green
Minor → Yellow
Moderate → Orange
High → Red
Under “Formatting style,” choose your preferred highlight colors
Remove “chips” (smart tags)
Under Advanced options, set Display style to “Plain text” to avoid chips interfering with filters
Setup Guides
Email List Cleaner & Validator for Windows
Prepare Your Script Folder
Create a folder called email_validator in the desired location.
(or drag the existing email_validator folder from the downloaded folder to the desired location.)
Make sure it contains:
The dist-folder - This folder contains your script and a runtime folder that will make sure you can run the script.
creds.json - This file was created during step 5/5 of the Google Cloud Setup. You shared the Google Sheet with the client_email from this file. ensuring your script can communicate with your Google Sheet.
config.json - This file has to have the name of the Google Sheet and tabs used. This allows the script to read from and write to the correct place.
Set Up Your Python Environment
To be continued...
FAQs
No coding skills required. You'll receive a simple step-by-step setup guide.
If you can install a program (Python) and follow clear instructions, you’ll be able to use it.
The script evaluates each email address in your list and assigns a Status ("Looks good" or "Needs review") and a Risk Score (Low, Minor, Moderate, or High), based on multiple checks.
What the Standard version includes:
✔ Duplicate removal – keeps only unique addresses
✔ MX record check – confirms if the domain can actually receive email
✔ Disposable domain detection – flags throwaway emails using a built-in list of 260+ known providers
✔ Role-based inbox warning – catches emails like info@, admin@, or support@ using 60+ known terms
✔ Placeholder address detection – flags addresses like test@, noreply@, yourname@
✔ Company website extraction – builds a URL from the email domain (e.g. @stripe.com → https://stripe.com)
What the Pro version adds:
✔ Spam trap suspicion – detects likely traps based on gibberish usernames, domain typos, and other patterns
✔ Real-name pattern check – identifies if the email resembles a human name (e.g. jane.doe@)
✔ Free email provider flag – highlights addresses from Gmail, Yahoo, Outlook, ProtonMail, etc.
✔ Domain classification – labels domains as Commercial, Government, Education, Military, etc.
✔ First name guess – tries to extract a likely first name from the local part (e.g. john.smith@ → John)
🔍 Note on name guessing:
The Pro version can suggest first names, but this is a best guess — not a guarantee. It works well with formats like john.smith@ or mary_j@, but not with randomly generated usernames or business inboxes. Always double-check the results before using them in outreach.
What the script doesn’t do:
✘ It does not ping inboxes or confirm whether the address is actively monitored
(Live inbox validation requires costly third-party services, often $50–$100/month)
Currently, the script works on Mac, as long as Python 3 is installed. A Windows compatible version is on its way.
A step-by-step setup guide is included.
You’ll need the following to run the script successfully:
– A Google account (for Google Sheets access)
– Python 3.x installed (Windows, Mac, or Linux)
– Internet connection
– Any modern computer (Windows 10/11, Mac Mojave or newer)
👉 Download Python
For most users, setup takes 15 to 30 minutes.
If you already have Python installed, it’s usually under 15 minutes.
Yes. It can handle thousands of emails.
Processing 1,000 emails typically takes 3 to 9 minutes depending on your internet speed and the quality of the domains.
Lists of 5,000 emails may take 20 to 45 minutes.
The script shows progress every 20 emails so you always know it’s working.
Google Sheets itself may become slow or hit limits around 50,000 rows. For very large lists, we recommend breaking them into smaller chunks.
There are no usage limits or fees for the script itself.
However, Google Sheets and some APIs have their own usage quotas. For most users, these are not an issue.
Yes. The script will process everything in the input sheet. Remove old entries to avoid reprocessing.
Yes. Each run clears the "EMAIL CHECK OUTPUT" tab and replaces it with new results.
📌 Tip: Duplicate the tab first to archive results.
The script can detect multiple emails in one cell if separated by commas, spaces, or semicolons.
Avoid using slashes or pipes (|).
MX checks work reliably in most cases, but false negatives can happen due to DNS issues or certain restrictions.
The script does not ping inboxes, which is both intentional and compliant with privacy best practices.
Your purchase includes a detailed PDF guide.
Support covers setup clarification only (no screen shares, installations, or live troubleshooting).
Pro license buyers get priority email support.
Customization is available for an extra fee.
Standard License: Personal or one-business use.
Business/VA License: Use across multiple businesses or clients.
No. Resale, redistribution, or sharing is prohibited under the license.
Your purchase includes the current version. Future updates may be discounted for existing buyers but are not guaranteed free.
Contact
Running into issues setting up the script? Ran into a bug that needs fixing? See something in the guides that could be clearer? Have a request for a future product? Just want to say hello?Drop me a line:
